

Ecco come fare:
#SPEED TEST

write-host "`nScript: "
write-host "SpeedTest con PowerShell"
write-host "-----------------------------------`n"

#IMPOSTAZIONE DELLA VELOCITA' MINIMA DA TESTARE
$MinimumSpeed=50


#SALVATAGGIO ATTUALE CONFIGURAZIONE SSL/TLS
#==========================================
$cur = [System.Net.ServicePointManager]::SecurityProtocol
[System.Net.ServicePointManager]::SecurityProtocol = [System.Net.SecurityProtocolType]::Tls12

#DOWNLOAD OOKLA ZIP
#==================
$OoklaWebPage=invoke-webrequest "https://www.speedtest.net/apps/cli" -UseBasicParsing | Select-Object -Property RawContent
$OoklaWebPageRows=$OoklaWebPage -split "<"
$URL=((($OoklaWebPageRows | Select-String "win64") -split " " | Select-String "href") -split "`"")[1]
$output = "$env:TEMP\speedtest.zip"
$TempFileName = "$env:TEMP\speedtest.exe"
$FileName = "$env:SYSTEMROOT\SYSTEM32\speedtest.exe"
#Download last version zip file
Invoke-WebRequest -Uri $URL -OutFile $output -Headers @{"Cache-Control"="no-cache"}
#Expand the zip file
Expand-Archive -Path $output -DestinationPath "$env:TEMP\" -Force


#Installa o aggiorna lo SpeedTest di Ookla
write-host "`nSPEEDTEST.EXE CHECK INSTALLAZIONE"
write-host "---------------------------------"

if ((Test-Path $FileName)) {
    write-host -nonewline "SpeedTest already installed "
    $PrecVersion=(cmd /c $FileName -V | select-string "Ookla") -replace "`n", ""
    $LastVersion=(cmd /c $TempFileName -V | select-string "Ookla") -replace "`n", ""
        if ($PrecVersion -ne $LastVersion) {
            write-host "but a new version is available on Ookla website."
            write-host -nonewline "Installed version of Ookla Speedtest:"
            $PrecVersion
            Move-Item $TempFileName $FileName -force
            write-host "Ookla version updated to latest version: $LastVersion"
        } else {
            write-host "with same version available on Ookla website."
            write-host -nonewline "Installed version:"
            $PrecVersion
        }
} else {
    write-host "SpeedTest not retrieved. Install it..."
    Move-Item $TempFileName $FileName -force
    write-host -nonewline "Installed latest version of Ookla Speedtest:"
    (cmd /c $FileName -V | select-string "Ookla") -replace "`n", ""
}

#Esegue lo SpeedTest ed assegna il valore a un oggetto
$Speedtest = speedtest.exe -p no --format=json --accept-license --accept-gdpr | ConvertFrom-Json
#$Speedtest = Start-Process -FilePath "$env:SYSTEMROOT\SYSTEM32\speedtest.exe" -verb runas -ArgumentList {-p no --format=json --accept-license --accept-gdpr}| ConvertFrom-Json
write-host "`nDATI DA SPEEDTEST"
write-host "-------------------------------------"
$Speedtest
write-host "-------------------------------------"

[PSCustomObject]$SpeedObject = [ordered]@{
    Download_speed = [Math]::Round(($Speedtest.download.bandwidth/1000000) * 8, 0)
    Upload_speed   = [math]::Round($Speedtest.upload.bandwidth / 1000000 * 8, 1)
    Packet_loss    = [math]::Round($Speedtest.packetLoss)
    Latency       = [math]::Round($Speedtest.ping.latency)
    #ISP           = $Speedtest.isp
    External_IP    = $Speedtest.interface.externalIp
    Internal_IP    = $Speedtest.interface.internalIp
    #Used_Server    = $Speedtest.server.host
    #URL           = $Speedtest.result.url
    Jitter        = [math]::Round($Speedtest.ping.jitter)
    Timestamp = get-date -date ([DateTime]::Now) -Format g
}


#Test if a speed is too much slow
if (($SpeedObject.Download_speed -lt $MinimumSpeed) -and ($SpeedObject.Internal_IP)) {
    $Data= foreach ($val in $SpeedObject.Keys) {"$val=$($SpeedObject.Item($val))`n"}
    write-host "`nVELOCITA' BASSA"
    write-host "-------------------------------------"
    write-host "Riscontrata velocità internet troppo bassa (< $MinimumSpeed Mbps) su $env:COMPUTERNAME`n`n$Data"
    write-host "-------------------------------------"
}

    #SALVATAGGIO ATTUALE CONFIGURAZIONE SSL/TLS
    #==========================================
        $cur = [System.Net.ServicePointManager]::SecurityProtocol
        [System.Net.ServicePointManager]::SecurityProtocol = [System.Net.SecurityProtocolType]::Tls12
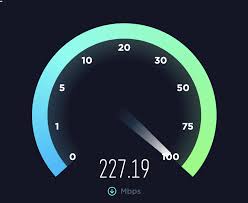
Si otterrà questo risultato:
SPEEDTEST.EXE CHECK INSTALLATION
--------------------------------
SpeedTest already installed with same version available on Ookla website.
Installed version:Speedtest by Ookla 1.2.0.84 (ea6b6773cf) Windows  AMD64

RAW DATA FROM SPEEDTEST
-------------------------------------


type       : result
timestamp  : 2024-09-08T08:40:19Z
ping       : @{jitter=1,500; latency=8,529; low=6,549; high=9,617}
download   : @{bandwidth=4713145; bytes=68382740; elapsed=15018; latency=}
upload     : @{bandwidth=51430; bytes=864340; elapsed=15003; latency=}
packetLoss : 0
isp        : Convergenze
interface  : @{internalIp=172.16.16.3; name=; macAddr=00:1C:42:2A:0D:8F; isVpn=False; externalIp=185.105.212.180}
server     : @{id=55285; host=speedtest2.convergenze.it; port=8080; name=Convergenze S.P.A S.B; location=Capaccio Paestum; country=Italy; ip=89.21.196.252}
result     : @{id=c017d084-b6c2-45ae-85b8-58af9cd6e5b2; url=https://www.speedtest.net/result/c/c017d084-b6c2-45ae-85b8-58af9cd6e5b2; persisted=True}

-------------------------------------

VELOCITA' BASSA
-------------------------------------
Riscontrata velocità internet troppo bassa (< 50 Mbps) su PARALLELS-PC

Download_speed=38
 Upload_speed=0.4
 Packet_loss=0
 Latency=9
 External_IP=185.105.12.180
 Internal_IP=172.16.16.3
 Jitter=2
 Timestamp=08/09/2024 10:40

-------------------------------------


 Come fare per pingare un range di indirizzi senza installare alcun programma di ip scanning? Semplice con Powershell.
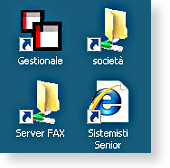
 Hai troppi file sul desktop?

Devi effettuare l'accesso per postare un commento.